Efficient Exit: A Tenant's Guide to End of Tenancy Cleanliness
Posted on 07/09/2025
Efficient Exit: A Tenant's Guide to End of Tenancy Cleanliness
Moving out of a rental property can be both exciting and stressful. One of the most critical responsibilities tenants face during this transition is ensuring that their rented home is left in immaculate condition. An efficient exit isn't just about moving your belongings; it's about meeting the strict standards of end of tenancy cleanliness. This detailed guide will walk you through every step required to leave your property spotless, boost your chances of a full deposit return, and maintain your reputation as a respectful tenant.
Why End of Tenancy Cleaning Matters
When signing a rental agreement, you likely paid a substantial deposit as security for any damages or breaches of contract. A considerable proportion of deposit deductions reported by tenants is due to inadequate end of tenancy cleaning. Landlords and letting agents typically expect tenants to return the property in the same condition in which it was originally rented (allowing for fair wear and tear). Meeting high cleaning standards for move out will not only ensure your deposit is returned but can also provide a positive reference for future rentals.
The Impact on Your Rental Bond
- Deposit Protection Schemes: Most countries require landlords to use deposit protection services. These often come with clear guidelines about cleanliness expectations at the end of a tenancy.
- Common Disputes: Dirty ovens, stained carpets, and limescale in bathrooms are frequently cited reasons for withholding deposits.
- Legal Obligations: Tenancy agreements may include detailed cleaning clauses. Failure to comply can result in costly cleaning fees.
Understanding Your Responsibilities as a Tenant
It's vital to understand the scope of your cleaning duties for a trouble-free move out. You are typically responsible for leaving the property as clean as it was when you moved in. Some agreements specify professional cleaning for carpets, windows, or upholstery.
Check Your Tenancy Agreement
- Read the Cleaning Clause: Go through the section of your lease that outlines cleaning obligations.
- Compare to Inventory: Review your check-in inventory and any photos to match the initial standard.
- Ask If Unsure: If your responsibilities seem unclear, contact your landlord or letting agent for clarification.
Planning Your End of Tenancy Clean
A successful end of tenancy clean is all about planning and thoroughness. Here, we provide a step-by-step timeline to ensure efficiency and avoid last-minute panic.
One Month Before Moving
- Declutter and Donate: Begin sorting belongings. Donate, sell, or dispose of items you no longer need.
- Book Professionals: If required, book professional cleaning services for carpets, windows, or any areas beyond DIY scope.
One Week Before Moving
- Gather Supplies: Collect cleaning products, equipment, and protective gear.
- Create a Cleaning Checklist: List every room and task that needs attention. Use the landlord's or agent's own checklist if available.
Moving Day
- Empty the Property: Move all furniture and personal items before cleaning begins for best results.
- Deep Clean: Work through the property from top to bottom and room to room, tackling the highest points (like light fixtures) first.
Comprehensive End of Tenancy Cleaning Checklist
Meticulous cleaning is the secret weapon for a smooth exit and deposit refund. Follow this room-by-room end of tenancy cleaning checklist to make sure all bases are covered.
General Living Areas and Bedrooms
- Dust and wipe: All surfaces, including windowsills, shelves, skirting boards, light switches, and curtain rails.
- Clean windows: Inside and (if possible) outside, including frames and sills.
- Vacuum and mop floors: Use appropriate products for each surface. Focus on corners and edges.
- Remove nails and wall hooks: Fill any holes responsibly and touch up paint if necessary (check tenancy agreement).
- Launder curtains and clean blinds: Dust or wash all window coverings as per manufacturer instructions.
- Empty wardrobes and drawers: Wipe interiors and remove any droppings or debris.
Kitchen
- Appliances: Deep clean the oven, hob, extractor fan, fridge, freezer, washing machine, and dishwasher. Remove grease, food debris, and odours.
- Countertops and cupboards: Wipe all surfaces, degrease where necessary, and empty all cabinets.
- Sinks and taps: Scrub sinks, polish taps, and remove any limescale.
- Bins: Empty and clean inside and out.
- Floors: Sweep and mop thoroughly, paying attention to under appliances.
Bathroom
- Toilet, basin, bath, and shower: Descale all fixtures, clean tiles and grout, and disinfect surfaces.
- Mirrors and glass: Buff until streak-free.
- Extractor fans: Dust and ensure good ventilation.
- Floors: Mop and ensure no hair or stains remain.
- Storage and shelves: Empty, wipe, and dry all units.
Other Areas
- Entrances and hallways: Clean doors, handles, and light fittings.
- Garden, balconies, or patios: Tidy outdoor spaces, remove rubbish or personal items, and sweep up debris.
- Garages or storage: Clear out and leave swept and empty as found.
DIY vs. Professional End of Tenancy Cleaning
A key decision to make is whether you will clean the property yourself or hire a professional move out cleaning service. Let's review the advantages and considerations of each approach.
DIY Cleaning
- Cost-effective: You avoid labour fees, only paying for products and equipment.
- Control: You ensure every area is cleaned to your personal standard.
- Time-consuming: Deep cleaning may take longer than expected without commercial equipment.
Professional Cleaning Services
- Guaranteed Work: Many companies guarantee their standards and offer re-cleans if agents are not satisfied.
- Specialist Equipment: Professionals use industrial products for stubborn stains, carpets, and ovens.
- Documentation: You may receive a cleaning certificate or invoice to provide evidence to your landlord or letting agent.
- Cost: A full professional end of lease cleaning can be a substantial expense, so factor this into your moving budget early.
Tip: If your tenancy agreement requires a professional clean, always obtain proof of service for your records.
Top Tips for an Efficient & Stress-Free Move Out
- Start Early: Begin cleaning non-essential areas in advance to avoid a time-crunch near your move-out date.
- Enlist Help: Family or friends can make the process faster and more fun.
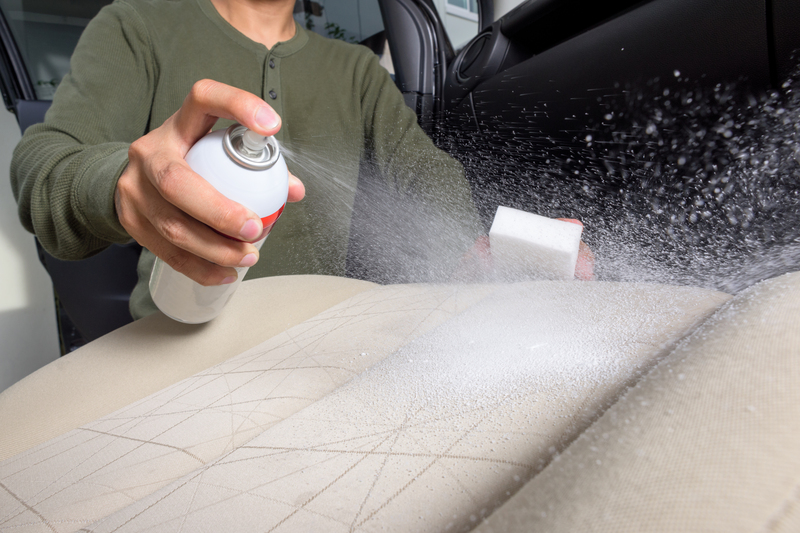
- Use the Right Supplies: Invest in quality products for limescale, grease, and stain removal. Microfiber cloths and a good vacuum are essential.
- Work Systematically: Move room by room, ticking off your checklist as you go.
- Photographic Evidence: Take dated photos of each cleaned area for your records and potential disputes.
- Schedule a Walkthrough: Arrange a pre-move-out inspection with your landlord to identify any problem areas with time to fix them.
What Landlords and Agents Are Looking For
They focus on hygiene, safety, and a "ready to rent" presentation for the next tenant. Common failings include overlooked areas such as under furniture, inside appliances, bathroom tiles, and skirting boards. A clean, fresh-smelling property with no visible dirt, dust, or damage is your goal.
Frequently Overlooked Areas During End of Tenancy Cleaning
- Behind & under appliances
- Kitchen extractor filters
- Inside light fixtures and ceiling fans
- Windowsills, tracks, and blinds
- Plug sockets and switches
- Door handles and tops of doors
- Stain or marks on walls and skirting boards
- Shower heads and hoses (descale!)
How to Handle End of Tenancy Issues or Disputes
Despite your best efforts, a dispute about cleanliness can sometimes arise. Protect yourself by keeping receipts, photographic evidence, and detailed checklists. If a disagreement emerges:
- Communicate calmly with your landlord or letting agent, providing your evidence and the inventory match-up.
- Negotiate minor deductions if truly unavoidable or negotiate for a re-clean instead of a lump sum charge.
- Use dispute resolution services if you are part of a tenancy deposit scheme. These are impartial, free, and can help secure a fair outcome.
Conclusion: Mastering Your Efficient Exit
An efficient exit and a spotless end of tenancy clean aren't just about securing your deposit--they reflect your personal standards and responsibility. Planning, thoroughness, and attention to detail are the ingredients that guarantee move-out cleaning success. Keep this comprehensive guide at hand, follow your personalized checklist, and invest time in a deep, detailed clean. Whether you choose the DIY route or hire professionals, you're safeguarding your finances, your rental history, and your peace of mind.
End of Tenancy Cleaning FAQs
Do I need to hire a professional for end-of-tenancy cleaning?
Not always! While some tenancy agreements specifically require professional cleaning, many simply require the property to be as clean as at move-in. Check your lease terms for clarity.
When should I schedule end-of-tenancy cleaning?
Ideally, schedule your cleaning for after all belongings have been removed and repairs completed. This allows you to clean thoroughly and spot any overlooked issues.
What happens if I miss a spot?
Some landlords will allow you to revisit the property and rectify missed areas. Others may withhold a portion of your deposit to cover their own cleaning costs. Detailed checklists and photographs can help avoid these issues.
Efficient Exit: Leave a Lasting Positive Impression
Completing a thorough and efficient end of tenancy cleaning is one of the most important parts of your rental journey. Not only does it protect your deposit, but it also ensures a smooth, professional handover. Follow this comprehensive guide, stay organized, and remember: a clean exit is the key to your next successful rental adventure.